Python, OpenCV, NumPyでカラー画像を白黒(グレースケール)に変換
PythonでNumPy配列ndarrayで表されたカラー画像を白黒(グレースケール)に変換する方法について、OpenCVの関数cv2.cvtColor()を使う方法とndarrayをそのまま計算する方法を説明する。
- 輝度信号Yの算出方法(YUVとRGBの関係)
- OpenCVの関数
cv2.cvtColor(),cv2.COLOR_BGR2GRAYで変換 cv2.imread()のグレースケール読み込みとの違い- NumPy配列
ndarrayを直接計算して変換
なお、Pillowではconvert('L')でモードをLに変換することで白黒に変換できる。
以下のサンプルコードのOpenCVのバージョンは4.2。バージョンが異なる場合は振る舞いが違う可能性があるので注意。各バージョンの公式ドキュメントは以下から。
輝度信号Yの算出方法(YUVとRGBの関係)
RGBのカラー画像を白黒(グレースケール)に変換する場合、輝度信号Yを算出することが多い。
BT.601では以下のような式でRGBからYを算出する。人間の視覚特性を考慮したもので、最も明るく感じるG(緑)の係数が大きくなっている。
Y = 0.299 * R + 0.587 * G + 0.114 * B
詳細はWikipediaなどを参照。
OpenCVの関数cv2.cvtColor(), cv2.COLOR_BGR2GRAYで変換
OpenCVには色空間を変換する関数cv2.cvtColor()がある。
第二引数codeで何から何に変換するかを指定する。コードの一覧は以下を参照。
OpenCVのcv2.imread()で画像ファイルを読み込んだ場合は色の並びがBGRなので、cv2.COLOR_BGR2GRAYを使う。
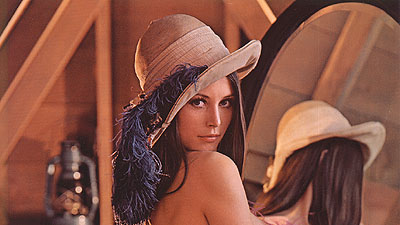
元画像の読み込み。
import cv2
import numpy as np

im = cv2.imread('data/src/lena.jpg')
print(im.shape)
# (225, 400, 3)

print(im.dtype)
# uint8
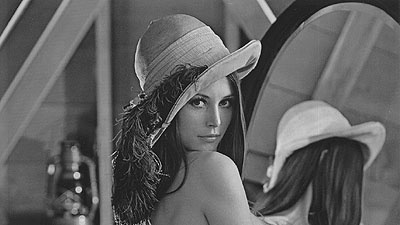
cv2.cvtColor()にcv2.COLOR_BGR2GRAYを指定して変換。
im_gray = cv2.cvtColor(im, cv2.COLOR_BGR2GRAY)
print(im_gray.shape)
# (225, 400)

print(im_gray.dtype)
# uint8

cv2.imwrite('data/dst/opencv_gray_cvtcolr.jpg', im_gray)
RGBの並びのndarrayをグレースケールに変換するcv2.COLOR_RGB2GRAYというフラグもある。
例えばPillowで画像ファイルを読み込んでndarrayに変換したときなど、OpenCV以外のライブラリで読み込むと多くの場合はRGBの並びになるので、そのような場合はcv2.COLOR_RGB2GRAYを使う。
以下の公式ドキュメントにあるように、グレースケールへの変換には上記の式が用いられている。
RGB to Gray:Y←0.299⋅R+0.587⋅G+0.114⋅B
OpenCV: Color conversions
cv2.imread()のグレースケール読み込みとの違い
cv2.imread()の第二引数flagsにcv2.IMREAD_GRAYSCALEを指定すると、カラーの画像ファイルをグレースケールで読み込むことができる。
im_gray_read = cv2.imread('data/src/lena.jpg', cv2.IMREAD_GRAYSCALE)
print(im_gray_read.shape)
# (225, 400)

print(im_gray_read.dtype)
# uint8

cv2.imwrite('data/dst/opencv_gray_imread.jpg', im_gray_read)

このように読み込んだグレースケール画像は、cv2.cvtColor()で変換したものと画素の値が完全に一致しない場合がある。
im_gray_diff = im_gray.astype(int) - im_gray_read.astype(int)

print(im_gray_diff.max())
# 10

print(im_gray_diff.min())
# -10
これは、以下の公式ドキュメントやStack Overflowの回答にあるように、cv2.imread()でcv2.IMREAD_GRAYSCALEを指定するとOpenCVで実装された変換処理ではなくコーデックに依存する変換処理が行われるため。
When using IMREAD_GRAYSCALE, the codec's internal grayscale conversion will be used, if available. Results may differ to the output of cvtColor()
OpenCV: Image file reading and writing
The reason is that there are multiple implementations of the grayscale conversion in play. cvtColor() is THE opencv implementation and will be consistent across platforms. When you use imread() to convert to grayscale, you are at the mercy of the platform-specific implementation of imread(). I wouldn't be surprised if imread() returns slightly different grayscale values on each platform. I can't think of any reason to ever convert to grayscale in imread.
python - Opencv - Grayscale mode Vs gray color conversion - Stack Overflow
cv2.IMREAD_GRAYSCALEとしたcv2.imread()だとプラットフォームによって結果が異なってしまうので、画素値を厳密に計算するような場合はcv2.cvtColor()を使うほうが安全。
NumPy配列ndarrayを直接計算して変換
Yの算出式はシンプルなものなので、ndarrayを直接計算してRGBをYに変換するのも簡単。
im_gray_calc = 0.299 * im[:, :, 2] + 0.587 * im[:, :, 1] + 0.114 * im[:, :, 0]
print(im_gray_calc.shape)
# (225, 400)

print(im_gray_calc.dtype)
# float64

cv2.imwrite('data/dst/numpy_gray_calc.jpg', im_gray_calc)

上の例はBGRの並びを前提としている。RGBの場合は色(最後の次元)の指定を変えればよい。
cv2.cvtColor()で変換したグレースケールとの差分の最大値と最小値は以下の通り。
im_gray_diff = im_gray_calc - im_gray

print(im_gray_diff.max())
# 0.4969999999999857

print(im_gray_diff.min())
# -0.4980000000000473
round()(偶数への丸め)で丸めるとcv2.cvtColor()の結果と一致するが、astype('uint8')の場合は切り捨てになるため差分が生じるので注意。
a = np.array([0.0, 0.1, 0.2, 0.3, 0.4, 0.5, 0.6, 0.7, 0.8, 0.9, 1.0])

print(a.round())
# [0. 0. 0. 0. 0. 0. 1. 1. 1. 1. 1.]

print(a.astype('uint8'))
# [0 0 0 0 0 0 0 0 0 0 1]

print(np.array_equal(im_gray_calc.round(), im_gray))
# True

print(np.array_equal(im_gray_calc.astype('uint8'), im_gray))
# False