Python, Pillowで文字(テキスト)を描画、フォント設定
Pythonの画像処理ライブラリPillow(PIL)を用いて画像上に文字(テキスト)を描画する方法について、フォントの設定方法とあわせて説明する。
- 画像に文字(テキスト)を描画:
ImageDraw.text()- 基本的な使い方
- 複数行のテキストの場合
- フォントを設定:
ImageFont.truetype()- 基本的な使い方
- フォントの場所
ttcファイルのインデックスを指定- アンカーの配置を指定
- バウンディングボックス(描画エリア)を取得:
ImageDraw.textbbox() - 日本語テキストの描画
Pillowの基本、円や四角などの図形描画については以下の記事を参照。
本記事のサンプルコードのPillowのバージョンは以下の通り。バージョンによって仕様が異なる可能性があるので注意。
import PIL

print(PIL.__version__)
# 9.2.0
以下の画像を例として使用する。
from PIL import Image, ImageDraw, ImageFont

img = Image.open('data/src/astronaut_rect.bmp')
画像に文字(テキスト)を描画: ImageDraw.text()
基本的な使い方
画像に文字(テキスト)を描画するには、ImageDraw.text()を使う。
ImageDraw.Draw()でImageDrawインスタンスを生成し、text()メソッドを呼ぶ。
第一引数xyにアンカー座標、第二引数textに描画する文字列、第三引数fillに色を指定する。
デフォルトではアンカー座標がテキストの左上になるように描画される。色は'red'のような色名のほか、(R, G, B)や'#xxxxxx'のように指定することも可能。以降の例を参照。
img = Image.open('data/src/astronaut_rect.bmp')

draw = ImageDraw.Draw(img)
draw.text((75, 50), 'Astronaut', 'red')

img.save('data/dst/pillow_imagedraw_text.jpg')

デフォルトではビットマップフォントが使われ、文字の大きさを変えることはできない。フォントを指定する方法は後述。
複数行のテキストの場合
ImageDraw.text()の第二引数に指定する文字列が複数行の場合、内部で自動的にImageDraw.multiline_text()に渡される。明示的にImageDraw.multiline_text()を使う必要はない。
複数行の場合、spacing引数(行間のピクセル数)とalign引数(配置)を指定できる。alignには左揃え'left'、中央揃え'center'、右揃え'right'を指定可能。デフォルトはspacing=4, aligh='left'。
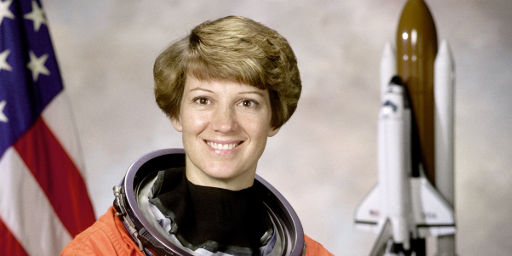
img = Image.open('data/src/astronaut_rect.bmp')

draw = ImageDraw.Draw(img)
draw.text((75, 50), 'I am an\nAstronaut', (255, 0, 0), spacing=10, align='right')

img.save('data/dst/pillow_imagedraw_text_multiline.jpg')

フォントを設定: ImageFont.truetype()
基本的な使い方
フォントはImageFont.truetype()で読み込んで設定する。
第一引数fontにフォントのファイル名、第二引数sizeにサイズを指定する。
font = ImageFont.truetype('Arial.ttf', 24)
読み込んだフォントをImageDraw.text()のfont引数に指定する。
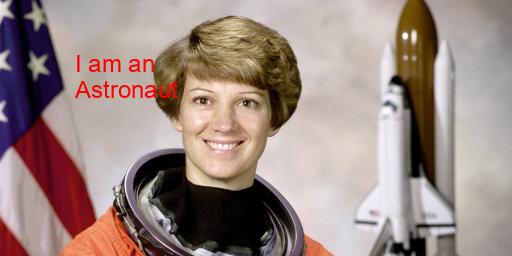
img = Image.open('data/src/astronaut_rect.bmp')

draw = ImageDraw.Draw(img)
draw.text((75, 50), 'I am an\nAstronaut', '#FF0000', font=font)

img.save('data/dst/pillow_imagedraw_text_arial.jpg')
なお、本記事のサンプルコードはmacOSで実行している。他のOSの場合はフォントが見つからない場合があるので注意。例えば、Windowsの場合、Arialは'arial.ttf'と指定する必要がある。次に説明するフォントファイルの場所を参考に適宜書き換えていただきたい。
フォントの場所
ImageFont.truetype()の第一引数fontにファイル名を指定すると、Windowsでは%WINDIR%¥Fonts(例えばC:¥Windows¥Fonts)、macOSでは/Library/Fonts/, /System/Library/Fonts/, ~/Library/Fonts/の中から探される。
If the file is not found in this filename, the loader may also search in other directories, such as the
fonts/directory on Windows or/Library/Fonts/,/System/Library/Fonts/and~/Library/Fonts/on macOS. ImageFont.truetype() - Pillow (PIL Fork) 9.2.0 documentation
Windowsの場合、Fontsフォルダの各フォントを右クリックしてプロパティを開くと実際のファイル名を確認できるので、それを指定する。重なったアイコンは複数のフォントファイルを含むフォルダなので、開いて内部のファイルのファイル名を指定する。
上記のディレクトリ(フォルダ)にないフォントの場合や、ファイル名のみを指定してもうまくいかない場合は、フォントファイルの絶対パスを指定すればよい。
ttcファイルのインデックスを指定
ttcファイルは複数のフォントファイルを収納したもの。
拡張子は「.TTF」と「.TTC」の2種類である。前者は単体のフォントファイルであり、後者は1つのファイルに、プロポーショナルフォントや等幅フォントなどの類似する複数のフォントファイルを収納したものである。 TrueType - Wikipedia
ImageFont.truetype()にttcファイルを指定した場合、index引数で読み込むフォントのインデックスを指定可能。デフォルトでは最初のフォントが読み込まれる(index=0)。
print(ImageFont.truetype('Helvetica.ttc').getname())
# ('Helvetica', 'Regular')

print(ImageFont.truetype('Helvetica.ttc', index=0).getname())
# ('Helvetica', 'Regular')

print(ImageFont.truetype('Helvetica.ttc', index=1).getname())
# ('Helvetica', 'Bold')

print(ImageFont.truetype('Helvetica.ttc', index=2).getname())
# ('Helvetica', 'Oblique')
ここではgetname()でフォントファミリーとフォントスタイルを取得して表示している。
アンカーの配置を指定
TrueTypeフォントを指定した場合、ImageDraw.text()のanchor引数でアンカーの配置を指定できる。
ImageDraw.text()の第一引数xyで指定したアンカー座標の、テキストに対する相対的な位置を決定する。デフォルトはxyがテキストの左上(top left)になる。
例えば、横方向を中央(middle: m)、縦方向を複数行のボトム(descender: d)に配置するには'md'と指定する。
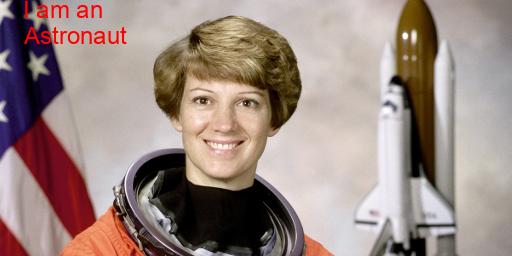
img = Image.open('data/src/astronaut_rect.bmp')

draw = ImageDraw.Draw(img)
draw.text((75, 50), 'I am an\nAstronaut', '#FF0000', font=font, anchor='md')

img.save('data/dst/pillow_imagedraw_text_anchor.jpg')
詳細は以下の公式ドキュメントを参照。
バウンディングボックス(描画エリア)を取得: ImageDraw.textbbox()
ImageDraw.textbbox()でテキストのバウンディングボックスを取得できる。前もって描画エリアを確認したい場合に使う。
(左上の点のx座標, 左上の点のy座標, 右下の点のx座標, 右下の点のy座標)を返す。
img = Image.open('data/src/astronaut_rect.bmp')

draw = ImageDraw.Draw(img)

print(draw.textbbox((75, 50), 'I am an\nAstronaut', font=font, anchor='md'))
# (23.0, 1, 127.0, 44)
テキストとあわせて図示すると以下のようになる。
draw.text((75, 50), 'I am an\nAstronaut', '#FF0000', font=font, anchor='md')
draw.rectangle(draw.textbbox((75, 50), 'I am an\nAstronaut', font=font, anchor='md'), outline='white', width=2)

img.save('data/dst/pillow_imagedraw_text_textbbox.jpg')

描画エリアが画像外にはみ出てしまう場合は座標がマイナスの値になる。
print(draw.textbbox((75, 50), 'I am an\nAstronaut', font=font, anchor='rd'))
# (-29.0, 1, 75.0, 44)
日本語テキストの描画
日本語のフォントを指定すれば日本語テキストを描画できる
ImageDraw.text()でdirection='ttb'とすると縦書きも可能。ttbは"top to bottom"の意味。
img = Image.open('data/src/astronaut_rect.bmp')

font = ImageFont.truetype('ヒラギノ丸ゴ ProN W4.ttc', 24)

draw = ImageDraw.Draw(img)
draw.text((100, 50), '私は', 'red', font=font, direction='ttb')
draw.text((75, 50), '宇宙飛行士', 'red', font=font, direction='ttb')

img.save('data/dst/pillow_imagedraw_text_ja.jpg')

なお、バージョン9.2.0時点で、複数行の縦書きはサポートされていない。
# draw.text((100, 50), '私は\n宇宙飛行士', 'black', font=font, direction='ttb')
# ValueError: ttb direction is unsupported for multiline text
複数行の縦書きは、上の例のようにアンカー座標をずらしながら一行ずつImageDraw.text()で描画する。厳密に位置を指定したい場合はImageDraw.textbbox()で描画エリアを取得するとよいだろう。